Virtual Try-On
Dress a model in your garment to get realistic on-model product photos, no photoshoot required.
Virtual Try-On puts your clothing on a model so you get catalog-ready on-model shots in seconds. Upload a flat garment photo, choose a model (from the library or your own), pick a quality mode and resolution, and generate. It is the fastest way to turn a packshot into a lifestyle product image.
At a glance
- You provide
- One garment photo (+ a model, optional)
- You get
- One on-model product image per generation
- Best for
- Turning packshots into on-model catalog photos
- Image formats
- JPG, PNG, WebP · up to 10 MB each
- Cost
- 1 to 3 credits, by generation mode and resolution
How it works
- 1
Upload your garment
Drag and drop or Browse Files to add a clear, flat photo of one garment or wearable item. Wait for the green check before generating.
- 2
Choose a model
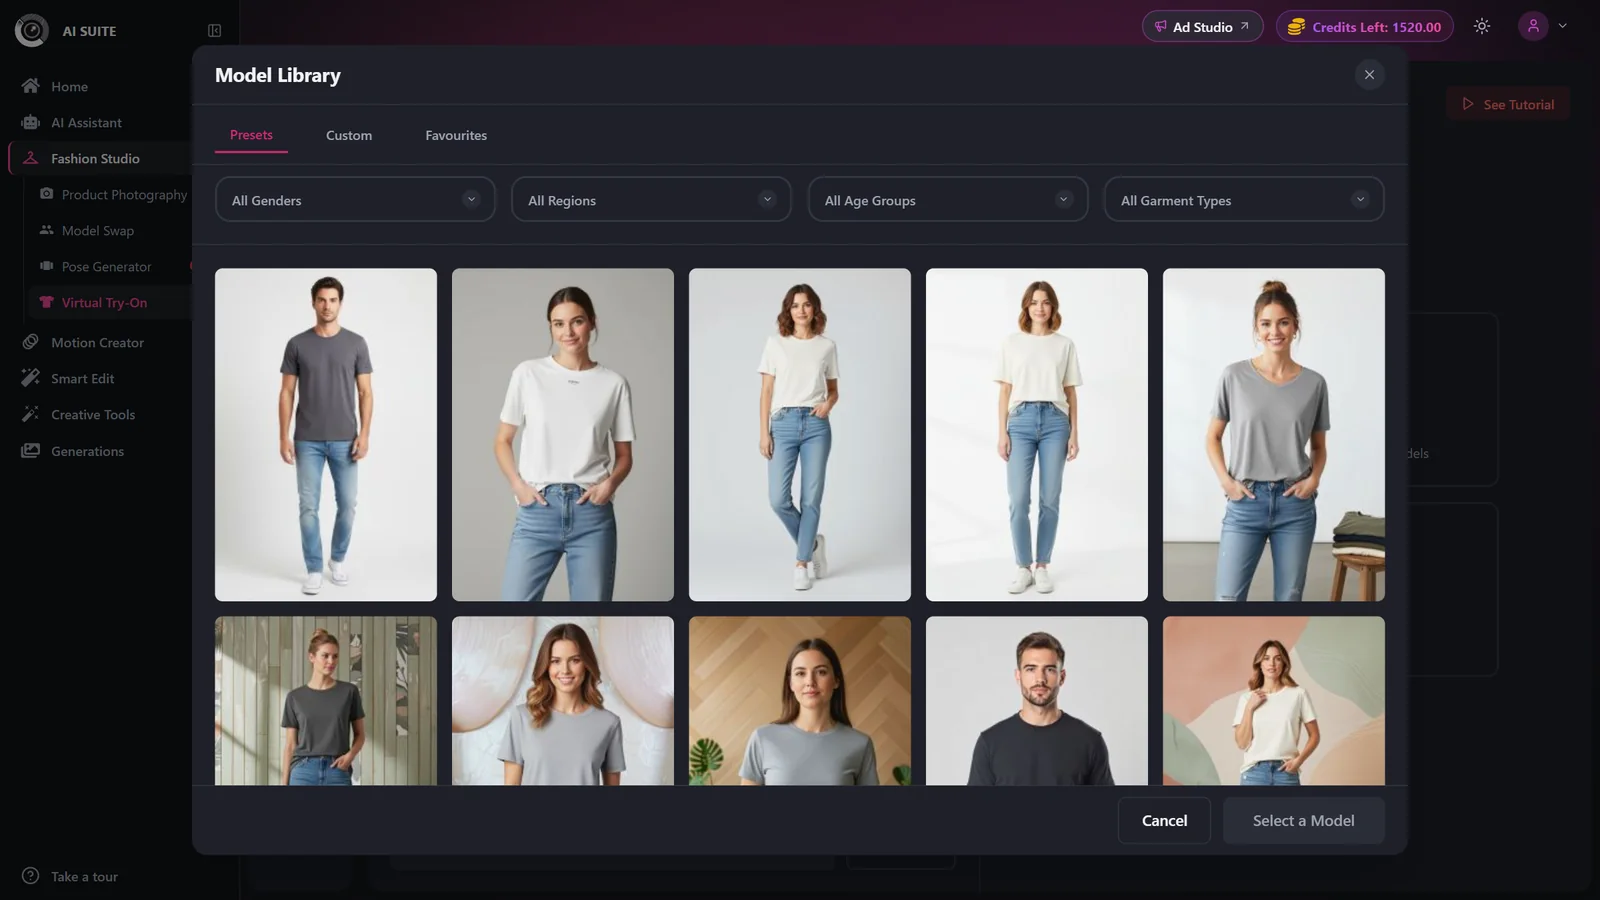
Open the Model Library and pick from Presets, your Custom models, or Favourites, then filter by gender, age group, and region. Every model works with every garment, so there is no garment-type to choose. Or click Upload Own Model and pick a photo of your own model: it is saved to your private Custom tab in one step and selected straight away. The garment is placed on the model automatically, so there is nothing to mask or trace.
- 3
Add styling instructions (optional)
Once a model is selected, a text box appears under it. Type a short instruction for how the garment is worn, such as "tuck in shirt", "roll up sleeves", "open jacket", or "remove scarf". Leave it empty for the default fit.
- 4
Pick a generation mode and resolution
Choose a Generation Mode (Fast, Balanced, or Quality) and a Resolution (1K, 2K, or 4K) above the upload area. The Generate button updates to show the exact credit cost of that combination.
- 5
Generate
Click Generate and you are taken to the results page while your image renders. Finished images are saved to Previous Results and your Generations history.
Settings & options
| Setting | Options | What it does |
|---|---|---|
| Model source | Model Library (Presets / Custom / Favourites) or your own upload | Use a library model, or upload a person photo to keep the same model across a shoot. Uploads are saved as private custom models you can reuse and delete. |
| Generation Mode | Fast · Balanced · QualityDefault: Balanced | Fast is the quickest and cheapest; Balanced adds detail; Quality pushes for maximum realism. |
| Styling instructions | Optional text, up to 500 characters | Adjust how the garment is worn or make small styling changes, for example "tuck in shirt" or "roll up sleeves". |
| Resolution | 1K · 2K · 4KDefault: 1K | Higher resolution costs more credits, so only go 4K when you truly need it. |
Each try-on is priced by generation mode and resolution:
- Fast at 1K: 1, 2K: 1.5, 4K: 2
- Balanced at 1K: 1.5, 2K: 2, 4K: 2.5
- Quality at 1K: 2, 2K: 2.5, 4K: 3
The Generate button always shows the live cost before you spend anything. Free accounts can use Fast or Balanced at 1K; Quality mode and 2K or 4K output are paid-plan benefits.
Best practices
Use a clear, well-lit, high-resolution garment photo. Flat-lay or ghost-mannequin shots work best.
Upload one item per try-on. For a full outfit, run the top and the bottom as separate generations, or upload a photo of the complete outfit.
Save your go-to models to Favourites or Custom so a whole collection shares one consistent model.
Draft in Fast at 1K to lock the look cheaply, then switch to Quality or a higher resolution for the final hero image.
Troubleshooting
Your plan allows a limited number of try-ons at once (one at a time on lower plans). Wait for the current one to finish, then generate again.
The garment is still uploading, or your uploaded model is still saving. Wait for the green check, then generate.
Placement is automatic and depends on the garment photo. Use a flat, fully visible shot of a single item on a plain background, then regenerate. Switching to Quality mode usually gives a cleaner result.
Those tiers are paid-plan benefits. See Plans & pricing to upgrade.
Watermark-free exports are a paid-plan benefit. See Plans & pricing to upgrade.
What to do next
Got a great on-model shot? Take it further: