Magic Eraser
Paint over unwanted objects, blemishes, or distractions and remove them cleanly from any image.
Magic Eraser removes anything you do not want in a photo. Upload an image, brush over the object, blemish, or distraction, then run the edit. The area is filled in to match its surroundings so the removal looks natural. It is the quickest way to clean up a product shot before you use it anywhere else.
At a glance
- You provide
- A single image plus a brushed selection of what to remove
- You get
- The same image with the selected object removed
- Best for
- Deleting an unwanted object, blemish, or distraction
- Cost
- 0.5 credit per edit (paid), 1 credit per edit (free)
Each removal costs 0.5 credit on a paid plan and 1 credit for free users. You confirm the cost before the edit runs, so nothing is spent by accident.
How it works
- 1
Open Magic Eraser
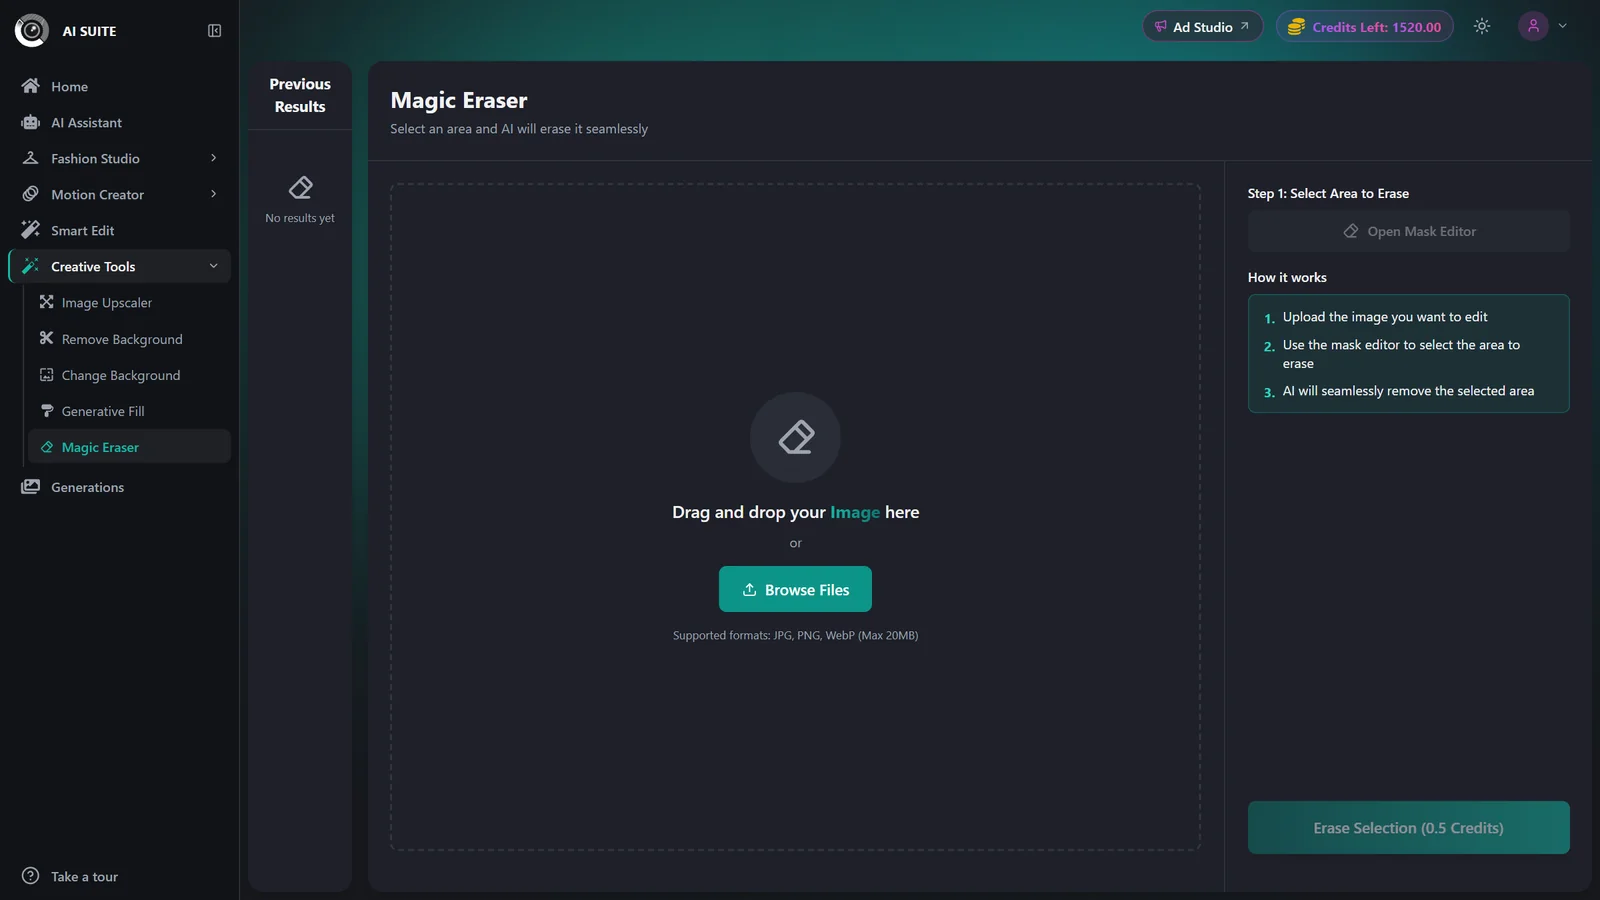
Go to the AI Suite and open the Magic Eraser tool.
- 2
Upload your image
Drag and drop or Browse Files to add the photo you want to clean up. Use a clear, high-resolution image for the best fill.
- 3
Brush over what to remove
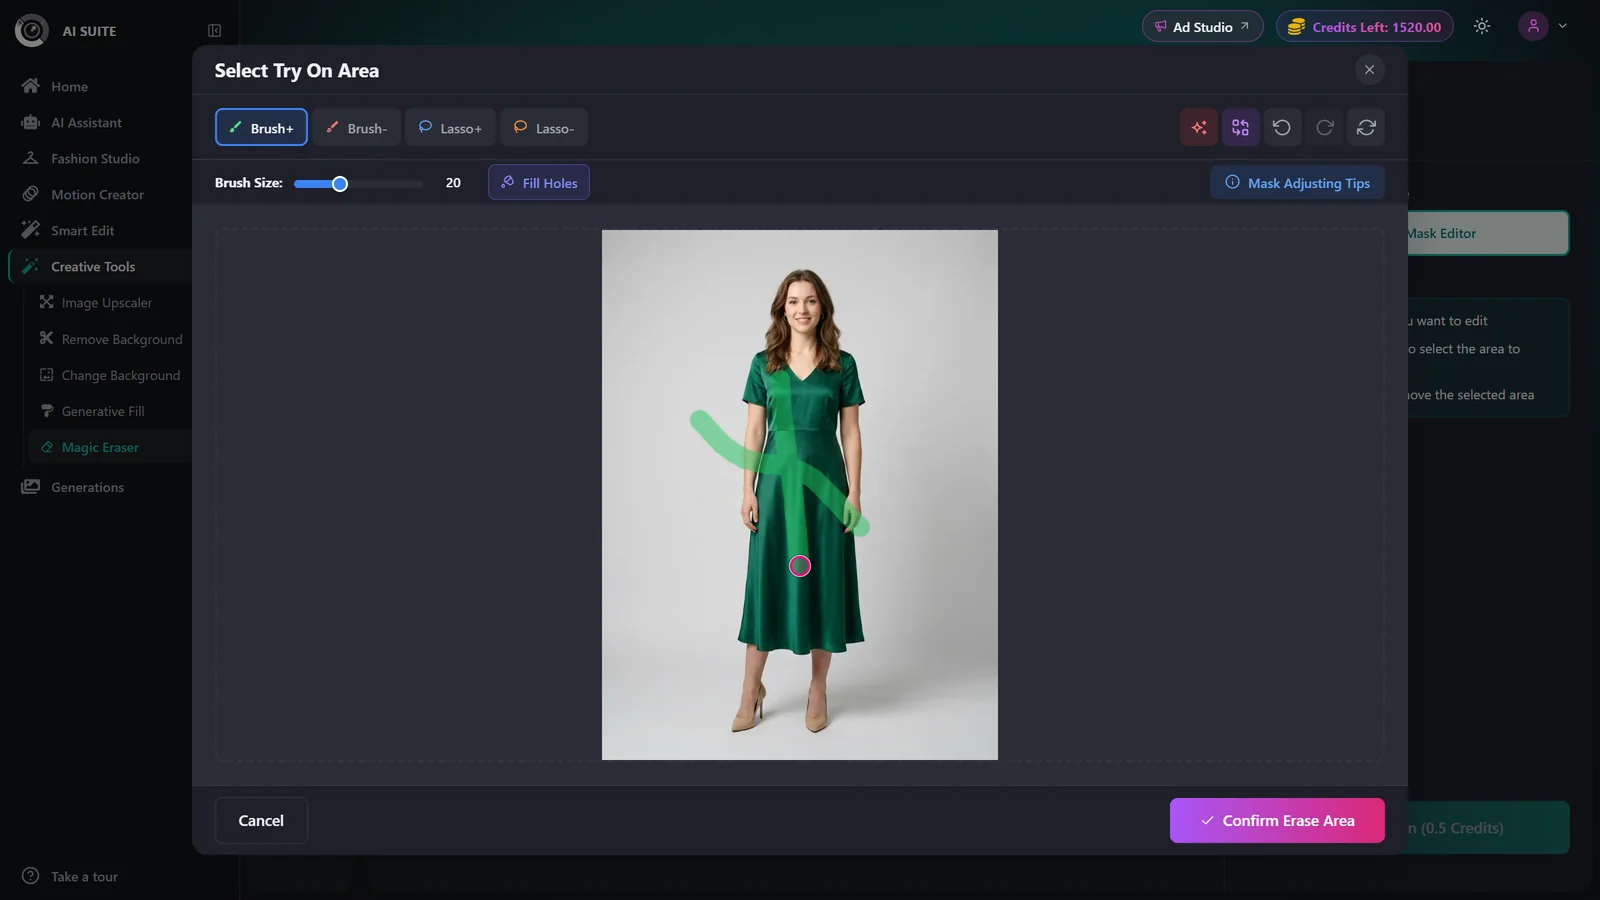
Paint over the object, blemish, or distraction you want gone. Cover the whole thing, and brush a little past its edges so nothing is left behind.
- 4
Confirm the cost and run
The tool shows the credit cost for the edit. Confirm it and run the removal. The brushed area is filled to blend with its surroundings.
- 5
Download the cleaned image
Review the result and download it. Finished edits are also saved to your Generations history.
Best practices
Brush slightly beyond the object edges so shadows and stray pixels are removed too, giving a cleaner fill.
Cover the entire object in one pass. Any part left unbrushed can stay in the result.
Start from a high-resolution image so the filled area matches the surrounding detail.
For busy or textured backgrounds, remove one object at a time and re-check the result before the next.
If you want to replace the erased area with new content rather than just clear it, use Generative Fill instead.
Troubleshooting
Some of it was outside your brush stroke. Brush over the leftover area, cover a bit past its edges, and run the edit again.
Complex or highly detailed backgrounds are harder to fill. Try a higher-resolution source image, or remove smaller regions one at a time.
Watermark-free exports are a paid-plan benefit. See Plans & pricing to upgrade.