Generative Fill
Paint over any part of an image and let AI fill, extend, or replace it based on what you describe.
Generative Fill lets you select a region of an image and regenerate just that area from a text prompt. Add an object, extend a background, or replace something you no longer want. Upload the image, brush over the area to change, describe what belongs there, and generate. Everything outside your mask stays untouched.
At a glance
- You provide
- One image, a masked area, and a prompt
- You get
- The same image with the masked area filled or extended
- Best for
- Adding, extending, or replacing part of an image
- Image formats
- JPG, PNG, WebP, up to 20 MB
- Cost
- 0.5 credit per fill on paid plans, 1 credit on free
Each generative fill is 0.5 credit on a paid plan and 1 credit on a free plan. The Generate button shows the exact cost before you spend anything, and credits are automatically refunded if a fill fails.
How it works
- 1
Open Generative Fill
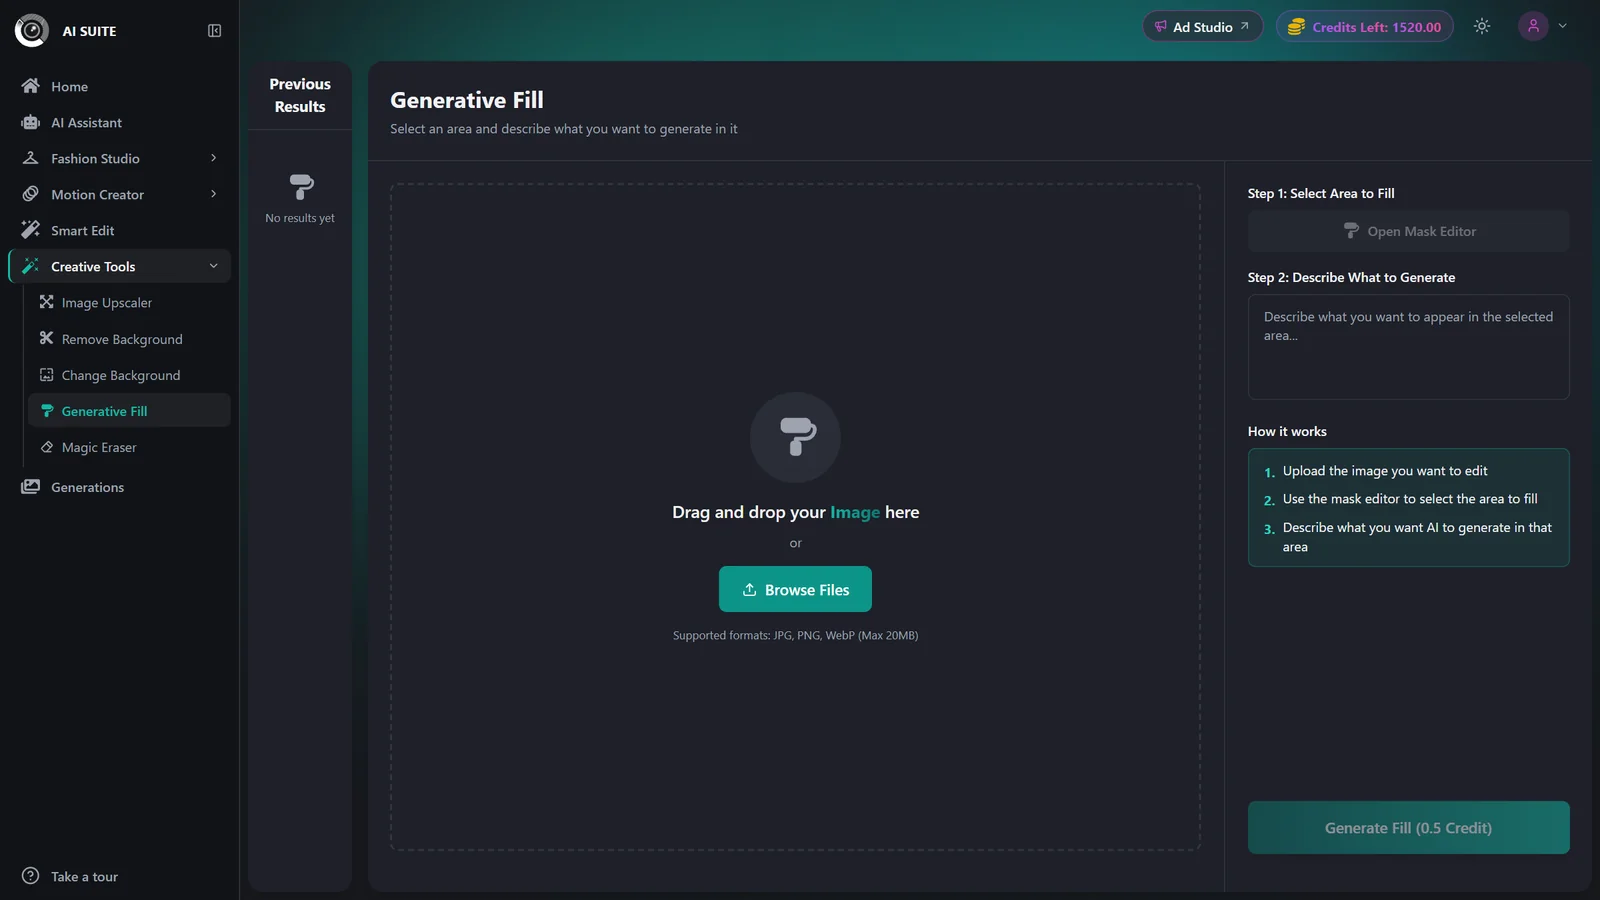
Open Generative Fill from the AI Suite. You will see an image drop area on the left and the controls on the right.
- 2
Upload your image
Drag and drop or Browse Files to add a JPG, PNG, or WebP up to 20 MB. Wait for the Ready badge to appear before continuing.
- 3
Mask the area to change
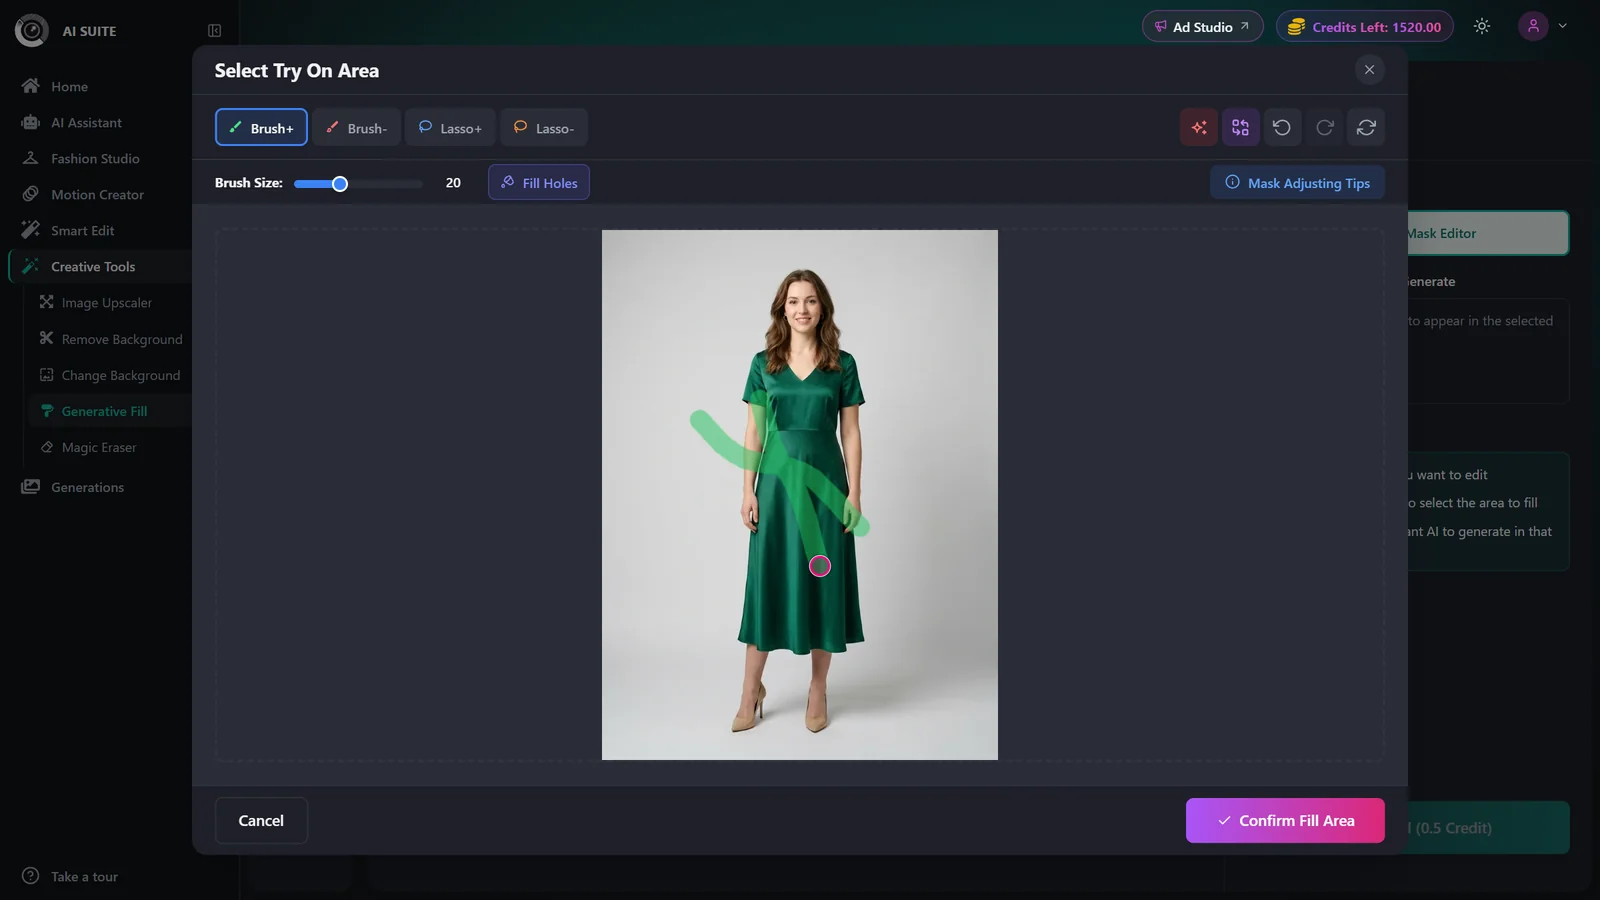
The mask editor opens automatically once the upload finishes. Brush over the exact region you want to fill, extend, or replace, then confirm. Your selection shows as a colored overlay on the image so you can check placement. Reopen Edit Mask any time to adjust it.
- 4
Describe what belongs there
Write a short, specific prompt for what should appear inside the masked area, for example the object to add or the background to extend. The prompt is required.
- 5
Generate
The Generate button shows the exact credit cost. Click it and you are taken to the results page while the fill renders. Finished images are saved to Previous Results and your Generations history.
- 6
Download the result
From the results page, download the finished image as PNG, JPG, or WebP.
Settings & options
| Setting | Options | What it does |
|---|---|---|
| Image | JPG, PNG, WebP, up to 20 MB | The single source image you want to edit. Required. |
| Mask | Brush in the mask editor | The area to regenerate. Only the masked region changes; everything else is preserved. Required. |
| Prompt | Free text | Describe what should fill the masked area. Required. |
Best practices
Keep the masked region tight around the area you actually want to change so the rest of the image stays intact.
Write a specific prompt that names the object, style, and lighting you want in the filled area.
To extend a background, mask a strip along the edge and describe the scene continuing.
To remove something, mask it and describe the background that should replace it.
Start from a clear, high-resolution image for the cleanest blend.
Troubleshooting
Upload an image and wait for the Ready badge first. The mask editor opens automatically once the upload finishes.
A fill needs all three inputs: an uploaded image, a confirmed mask, and a prompt. Add whichever is missing.
Open Edit Mask and paint a tighter selection around only the area you want to change, then regenerate.
Watermark-free exports are a paid-plan benefit. See Plans & pricing to upgrade.