

Table of Contents
Batch photo editing applies selected operations to multiple images in one workflow. Adobe’s batch editing guide explains how to synchronize only the settings you choose. For clothing catalogs, define one presentation specification, then group photos by correction needs to match backgrounds, framing and brightness without erasing real garment differences. Our browser-based AI Assistant coordinates workflows for up to 500 products, with up to 100 image attachments per bulk upload. For targeted edits, start with our Smart Edit photo editor.
You need a browser, source images, a reliable reference and basic crop, color and visual-review skills. Allow time for editing, generation, retries and review; the total depends on image count and correction complexity.
Choose your batch photo editing workflow
Use synchronized adjustments for similar originals, adaptive correction for varying lighting, and generative editing only when image content needs changing.
| Method | What happens | Best use |
|---|---|---|
| Synchronized adjustments | Copies selected settings across images | Groups captured under similar conditions |
| Adaptive correction | Evaluates images individually | Different exposures within a consistent overall look |
| Generative editing | Changes or creates image content | Targeted background replacement or repair |
Adobe’s Adaptive profiles adjust color, tone and contrast in RAW and DNG images on Lightroom web. IPTC’s generative editing definition includes inpainting and outpainting. Because these operations change content, check that they preserve garment details.
For large catalogs, separate the overall workflow into upload-sized groups. Product capacity, upload limits and reference-image limits serve different purposes:
| Workflow or input | Capacity | What the limit means |
|---|---|---|
| Our Assistant workflows | Up to 500 products | Coordinated multi-product workflow |
| Our Assistant bulk attachments | Up to 100 attachments | Images attached in one bulk upload |
| Our Smart Edit references | Up to 10 input images | Combining references, not a 10-product batch limit |
Our subscription pricing includes a 7-day trial for US$1 with 20 credits. Creator costs US$49 per month plus applicable taxes after its trial.
For a free desktop option, GIMP is free software, and its ScriptFu batch tools support batch processing. Choose it if your team is comfortable with scripting.
How can I make clothing product photos look consistent when the original shots have different backgrounds and lighting?
Define one output specification for background, canvas, framing, alignment, shadows and brightness, then group originals by lighting and background problems. Correct exposure and color within each group rather than applying the same settings to every photo. Preserve actual garment color, texture, length and proportions.
1. Define the finished look before editing
Use separate framing references for flat lays, hanging garments, on-model photos and detail views.
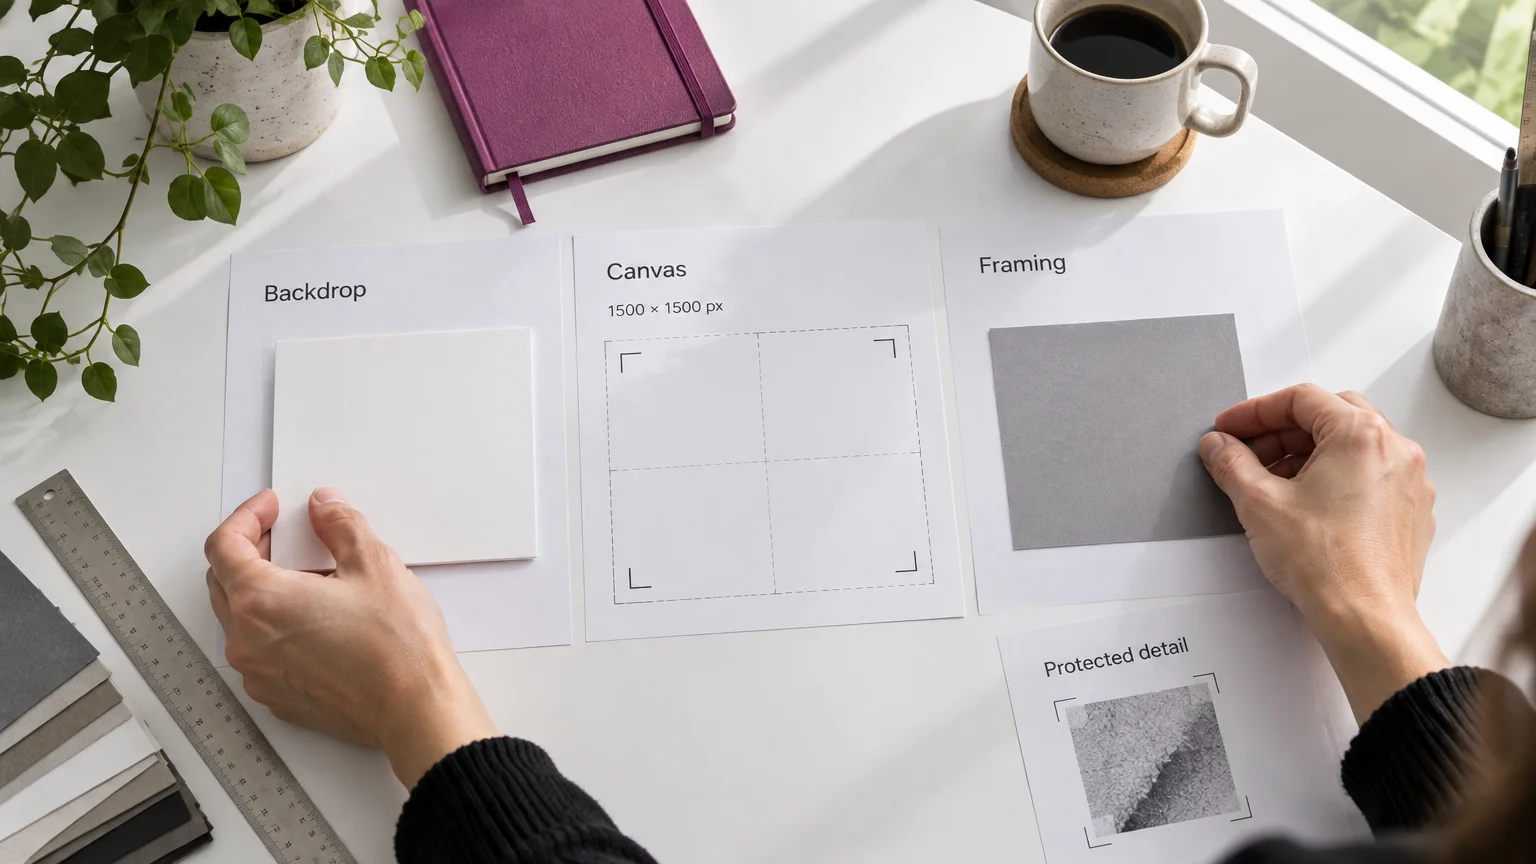
Example: a catalog output specification
For square main images in a clothing catalog, use the specification below and adapt it to your destination channel.
| Attribute | Target |
|---|---|
| Backdrop | White and neutral |
| Canvas | 1500 × 1500 pixels |
| Framing | Consistent margins within each shot type |
| Scale and alignment | Comparable visual scale and centered placement; preserve proportions |
| Shadow | Soft grounding shadow with consistent direction |
| Brightness | Match the approved reference while retaining fabric detail |
| Protected attributes | Actual colorway, weave, seams, logos, edges, length, fit and proportions |
Google’s image best practices recommend 1500 × 1500 pixels or larger and product occupancy of 75% to 90% of the frame. Apply these channel recommendations alongside your shot-type references, without making a long dress and a short top appear the same length.
As of October 13, 2026, Google’s clothing size guidance lists a 250 × 250-pixel minimum. Its announced image requirements raise the minimum to 500 × 500 pixels for all products beginning January 31, 2027.
GS1’s product image standard calls for no color casts and shadows that reveal shape while keeping text and logos visible.
2. Protect originals and group photos by correction needs
Keep originals unchanged, edit working copies, and map each source to its output using SKU and view names. Group catalog photos by correction need, shot type and whether the source detail can be recovered.
| Source problem | Shared action | Exception route |
|---|---|---|
| Mismatched backgrounds | Targeted background replacement | Individually inspect delicate edges |
| Recoverable lighting or color cast | Exposure and white-balance correction | Isolate mixed-light images |
| Uneven framing | Crop, rotate and resize | Individually place unusual silhouettes |
| Lace, fringe or translucent edges | Careful subject isolation | Individual masking or retouching |
| Missing product detail | Inspect RAW or alternate photographs | Reshoot if reliable detail is unavailable |
Choose references with accurate color, texture, edges and proportions. Build a small pilot containing a typical image and a difficult example from every intended group. Keep on-model views and flat lays in separate correction groups.
3. Correct crop, exposure and backgrounds selectively
Use conventional corrections whenever the original contains enough information; reserve generative changes for necessary content edits.
- Crop and resize: batch compatible views, retaining sleeves, hems and intended margins.
- Exposure and white balance: synchronize only suitable settings. Adobe’s white-balance instructions recommend sampling a neutral area, not a colored garment.
- Backgrounds: isolate the subject, remove or replace the backdrop, then inspect lace, fringe, transparent edges and grounding shadows.
- Enhancement: use restrained contrast and sharpening. Avoid indiscriminate filters, saturation boosts and full-image regeneration.
Correct lighting casts without changing genuine colorways: each variant must retain its exact color, pattern, finish and material. Verify canvas dimensions, margins and scale during review and export rather than relying on the editing request alone.
4. Upload a pilot and approve a targeted editing plan
Upload the pilot first and approve a specific editing plan before scaling to the catalog.
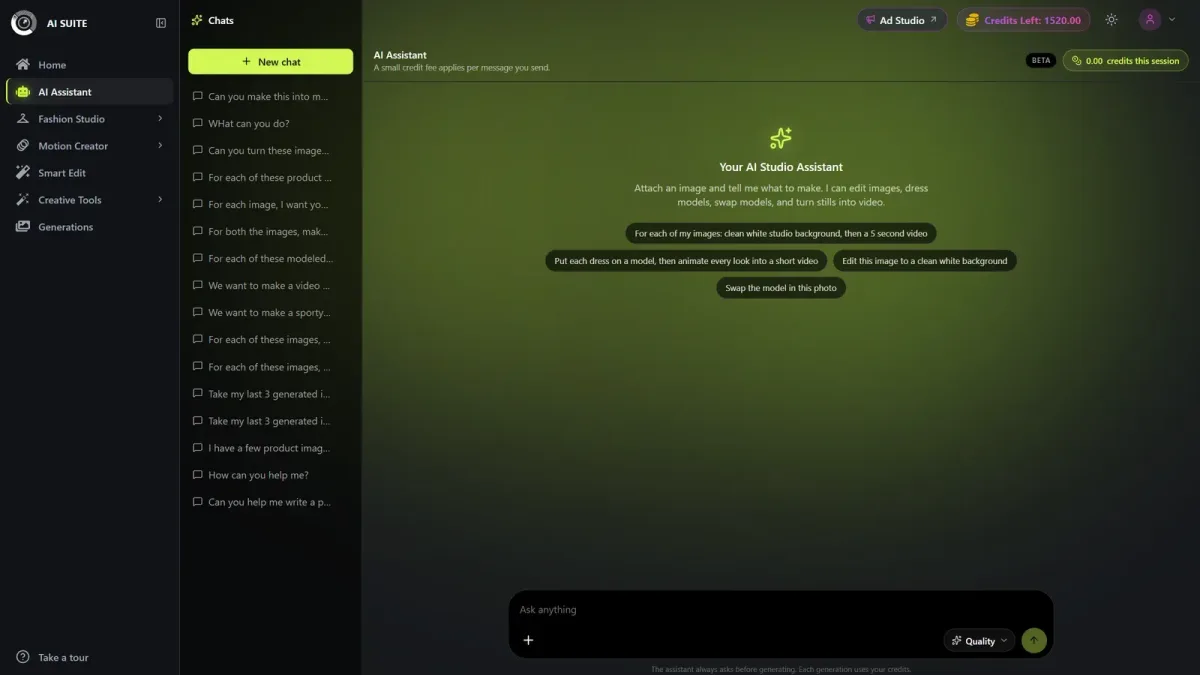
Our Assistant accepts JPG/JPEG, PNG and WebP files up to 10 MB each. Prepare supported working copies while retaining originals. Use our AI Assistant to coordinate multiple product images; a dedicated editor is simpler for one asset.
Replace only the background with white. Preserve the source garment’s actual color, texture, seams, logos, lace, edges and hem length. Match framing to the reference for this shot type without changing proportions. Keep a soft grounding shadow. Flag images that cannot meet these targets safely.
Before approving generation, review the proposed tool, settings, input previews, estimated time and credit cost.
Our Smart Edit models include Nano Banana 2. Use reference images to communicate the intended presentation, then review every model’s output for garment fidelity.
5. Review garment fidelity before scaling the batch
Approve the pilot only when garment details remain accurate and the presentation meets your specification. Compare outputs with originals and reliable references.
- Garment: check color, weave, seams, logos, lace, fine edges, silhouette, hem length and proportions.
- Presentation: check background, alignment, crop, shadow direction and brightness.
Use this exception log to track problems and assign each output a decision: accept, individually correct or reshoot.
| SKU / view | Source group / intended edit | Observed defect / fidelity concern | Corrective action | Disposition |
|---|---|---|---|---|
| TOP-A / front | Busy backdrop / replace background | Missing lace edge / construction lost | Mask original edge individually | Individually correct |
| SHIRT-B / front | Warm cast / neutralize lighting | Blue shifted / wrong colorway | Conventional color correction | Individually correct |
| DRESS-C / side | Gray backdrop / replace background | Altered hem / incorrect length | Reject output; retry background-only edit | Individually correct |
Apply approved instructions only to compatible groups. Route failed images through the exception log for targeted correction. Reject attractive catalog images if they misrepresent the garment.
6. Download selected outputs and verify catalog files
Download only approved outputs. JPG is the default image download in our generation download workflow; Assistant batch runs are organized in the Assistant Workflows library.
- Preserve SKU and view naming through your source-to-output mapping and verify output filenames.
- Check pixel dimensions, crop, format, file integrity and destination requirements.
- Use sRGB conversion where supported, following Adobe’s web color guidance.
- Use JPG for photographic deliverables. Choose PNG for transparency only when supported, or WebP when the destination accepts it.
Inspect representative downloads outside the editor. Keep originals, approved outputs and the exception log together for future editing runs.
Frequently asked questions
Can I use batch photo editing to create Instagram or campaign images from the same product photos?
Yes. Keep approved catalog images as protected master files and create separate social or campaign variants. Apply destination-specific crops, backgrounds and copy without changing the garment. Review campaign variants for product fidelity before publishing.
Should I apply the same settings to every product photo?
Apply the same settings only to photos with compatible lighting, backgrounds and shot types. Mixed supplier images usually need separate correction groups or image-specific adjustments, even when they share one final presentation specification.
What is the best free batch photo editor?
GIMP is a good free desktop option if you are comfortable using ScriptFu for batch processing. Set up the script on working copies and test it on a small pilot before processing your catalog.
Is batch photo editing free?
It can be free when you use software such as GIMP. Subscription tools and approved AI generations may carry separate costs, so distinguish free access from a paid trial and generation credits.
What is the best AI tool for batch photo editing?
Our AI Assistant is a practical option for coordinating targeted edits across clothing catalogs, with proposal review before generation. Lightroom’s Adaptive profiles suit image-specific color, tone and contrast correction in RAW and DNG files. Choose based on the correction task, and review garment fidelity before approving results.
Know when to retouch individually or reshoot
Retouch individually when usable detail remains; reshoot when reliable product detail is missing. A professional retoucher can handle difficult masks and subtle color matching. A professional photographer can correct inadequate source capture.
Adobe’s clipping guidance explains that completely white or black clipped areas contain no image detail. Check available RAW files or alternate views before deciding to reshoot. GIMP’s image scaling guidance confirms that interpolation does not add original detail. Generated weave is not evidence of the actual fabric.
Avoid overwriting originals, copying every setting, forcing identical garment scale, changing colorways or skipping pilot and export checks.
Standardize presentation, not the product. Start a controlled pilot with our AI Assistant.